Let's Do it Together!
Step 1: Identify Domain Host
Find out who is hosting your domain.
You now know the hoster of your domain.
Step 2: Log Into Host Website
Log into your domain host's website.
You are logged into your domain host's account.
Step 3: Prepare DNS Records
Ensure you can add DNS records to your domain.
You can now add DNS records.
Step 4: Access Keyhook
Navigate to Keyhook.
You are in the Keyhook interface.
Step 5: Go to Agency Configuration
Click on Agency then Agency Configuration.
You are in the Agency Configuration section.
Step 6: Open Email Management
Click into Email Management.
Email Management opens.

Step 7: Add Email Domain
Click on Add an email domain.
You can now add your email domain.

Step 8: Enter Domain
Type in your domain in the Modal.
Step 9: Save Domain
Click Save to get the domain is saved successfully.
Step 10: Verify Domain
Click on Verify.
Verification instructions appear.
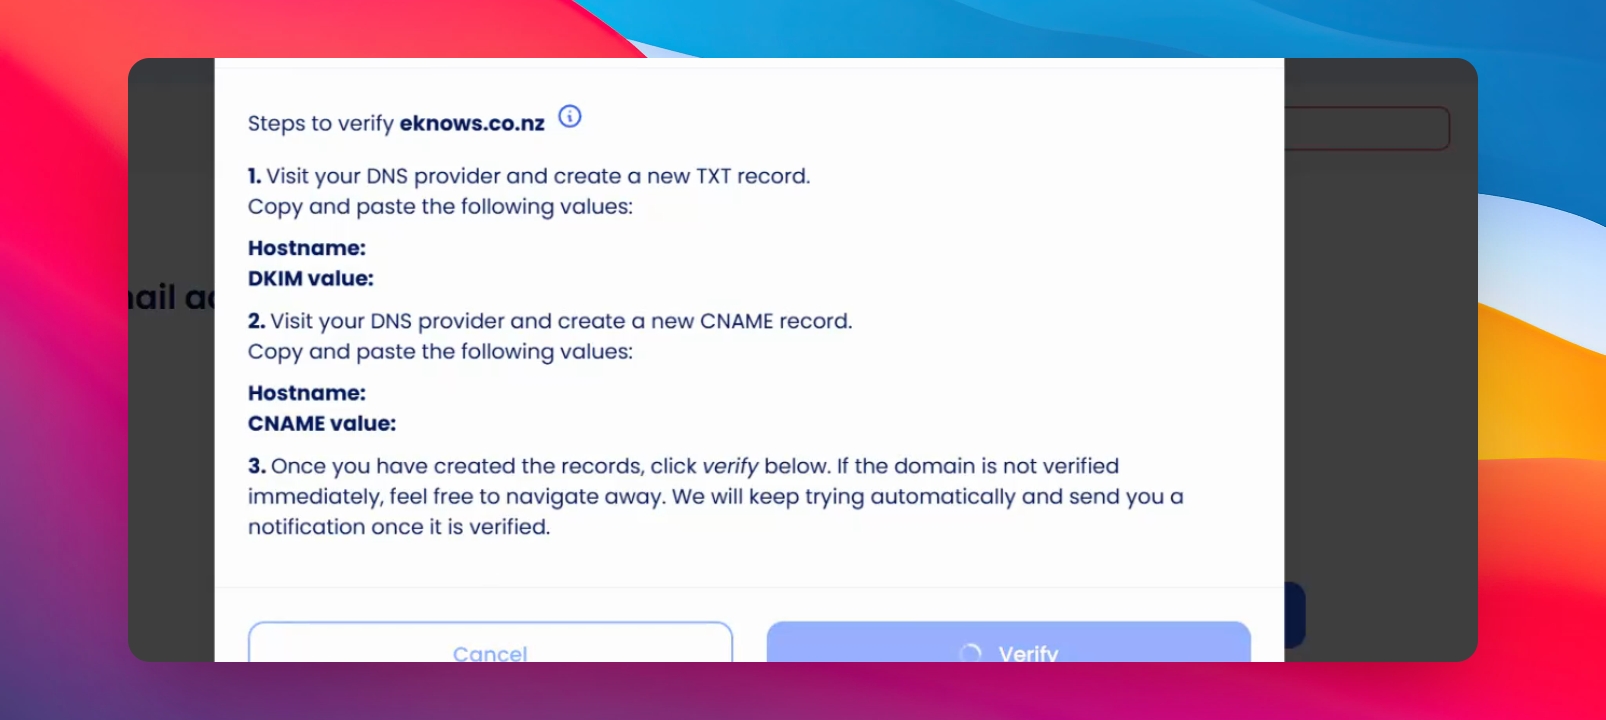
Step 11: Get Verification Values
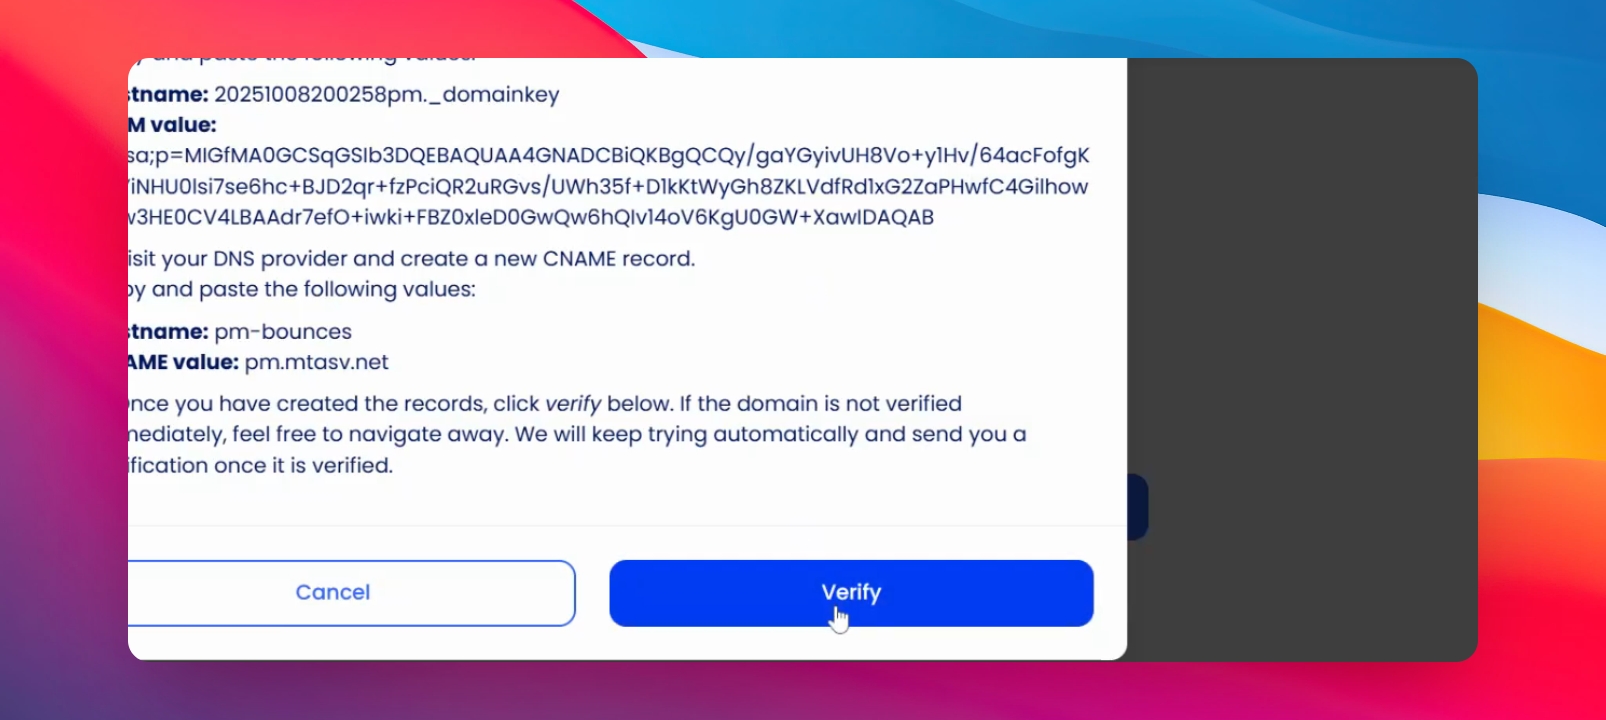
Click Verify again to get the values.
Verification values are displayed.

Step 12: Create TXT Record
Click on Create a new and select TXT record.
TXT record creation begins.
Step 13: Enter TXT Values
Copy the values into the host name field and DKIM value.
Values are entered in the TXT record.
Step 14: Save TXT Record
Save the TXT record.
Step 15: Create CNAME Record
Create a new a CNAME record from your Domain providers website.
Step 16: Enter CNAME Information
Copy the necessary information for the CNAME record and paste it in the domain verification portal.
Step 17: Save CNAME Record
Save the CNAME record in your domain record.
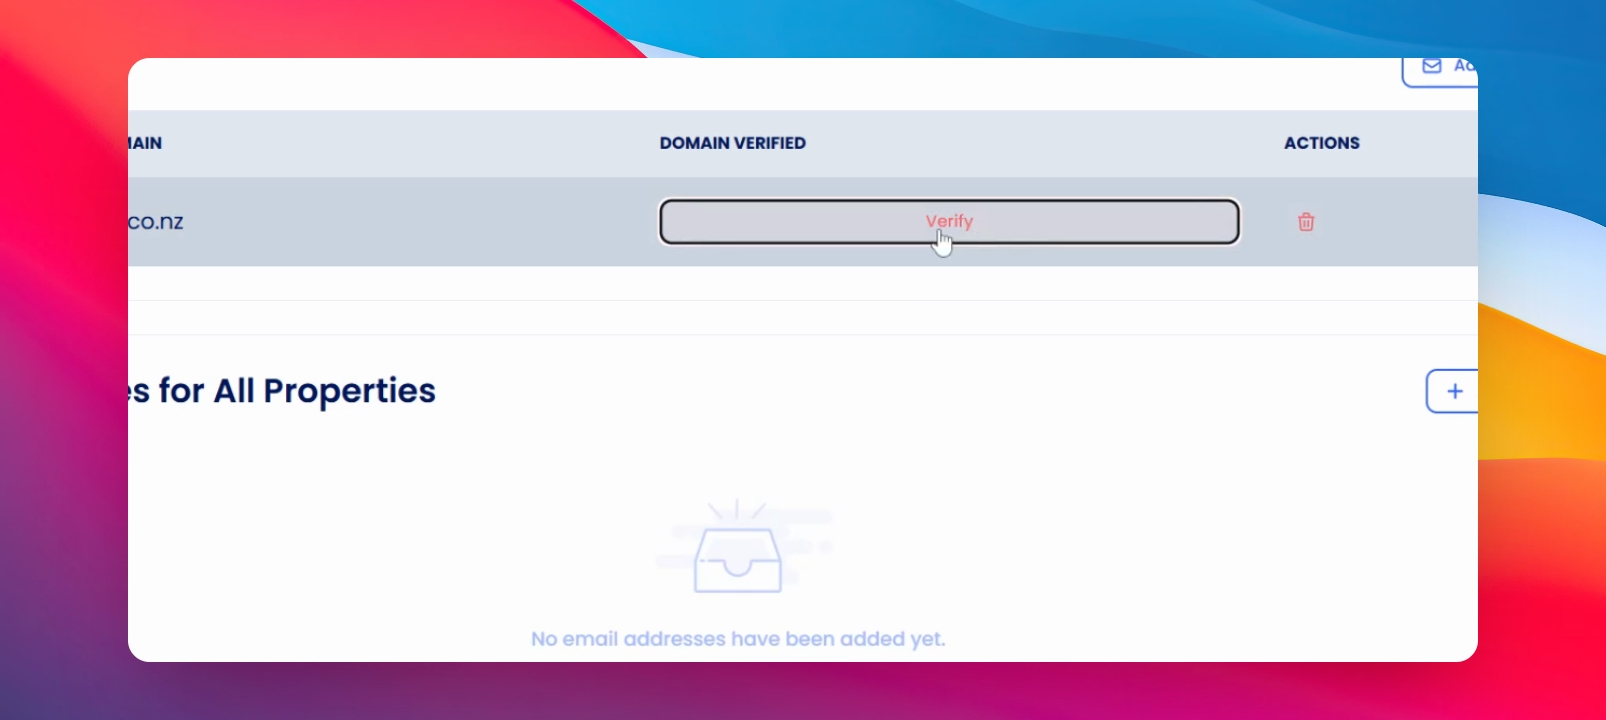
Step 18: Verify Domain Again
Click Verify again.
Step 19: Await Verification Confirmation
Wait for the verification to complete.
Status changes to confirmed once verified.
If you need more help or have any questions, just reach out to us at support@keyhook.com — we're always here to help!
Click on this link to give a feedback:Support Article Feedback Form