Introduction
Issuing notices to tenants is an essential part of property management. In this tutorial, we will guide you through the process of preparing different types of notices, including breach and antisocial behavior notices. By following these straightforward steps, you will be able to effectively communicate important information to your tenants and ensure compliance with your requirements.
How to instructions
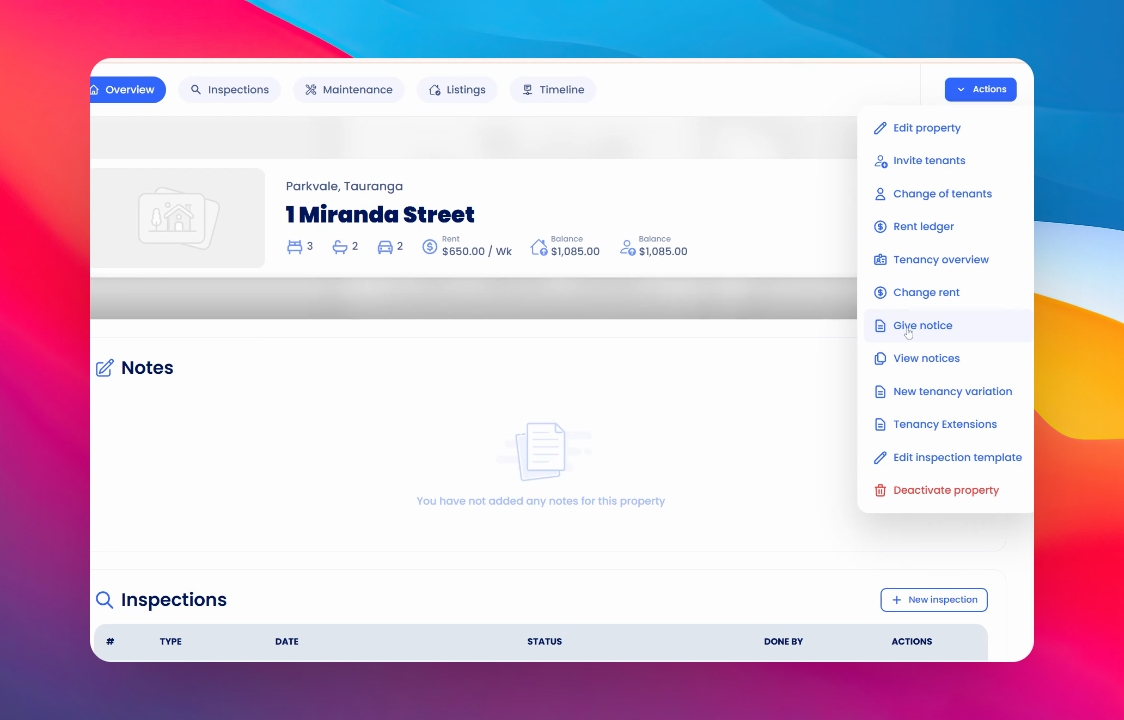
1. Accessing Notice Options
Navigate to the property overview and click on Actions. Within the dropdown menu, select Give Notice to view the various types of notices available for issuance.
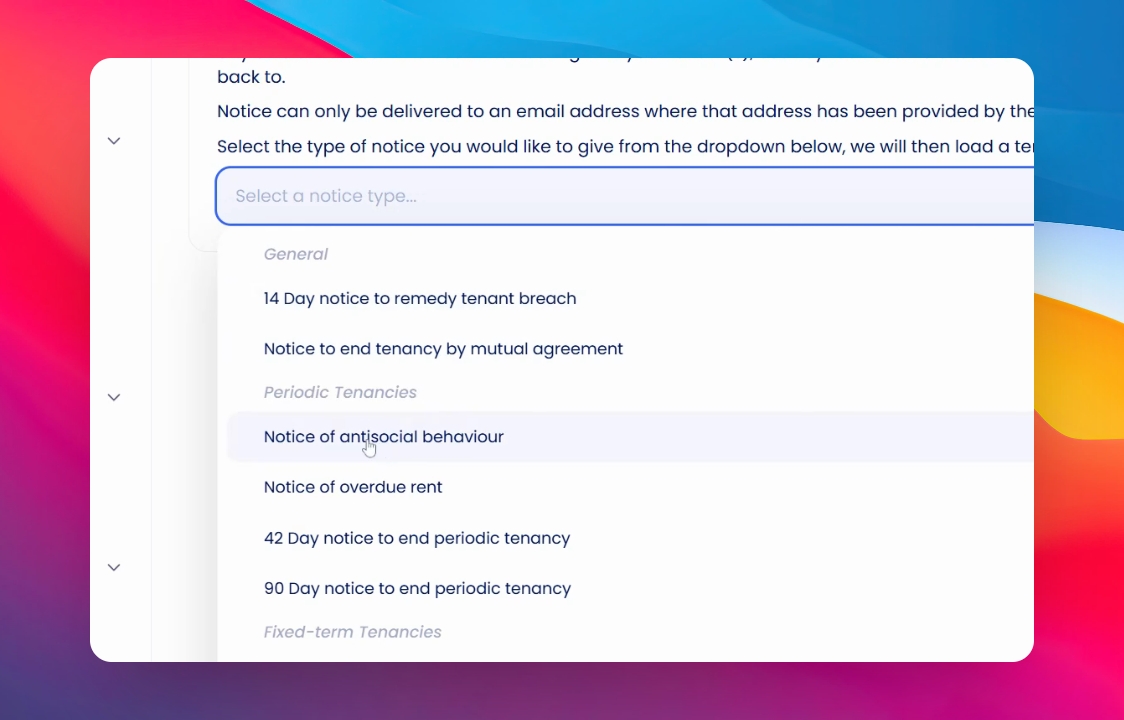
2. Selecting Notice Type
Choose the appropriate notice type from the list, for example, a Notice of Antisocial Behaviour.
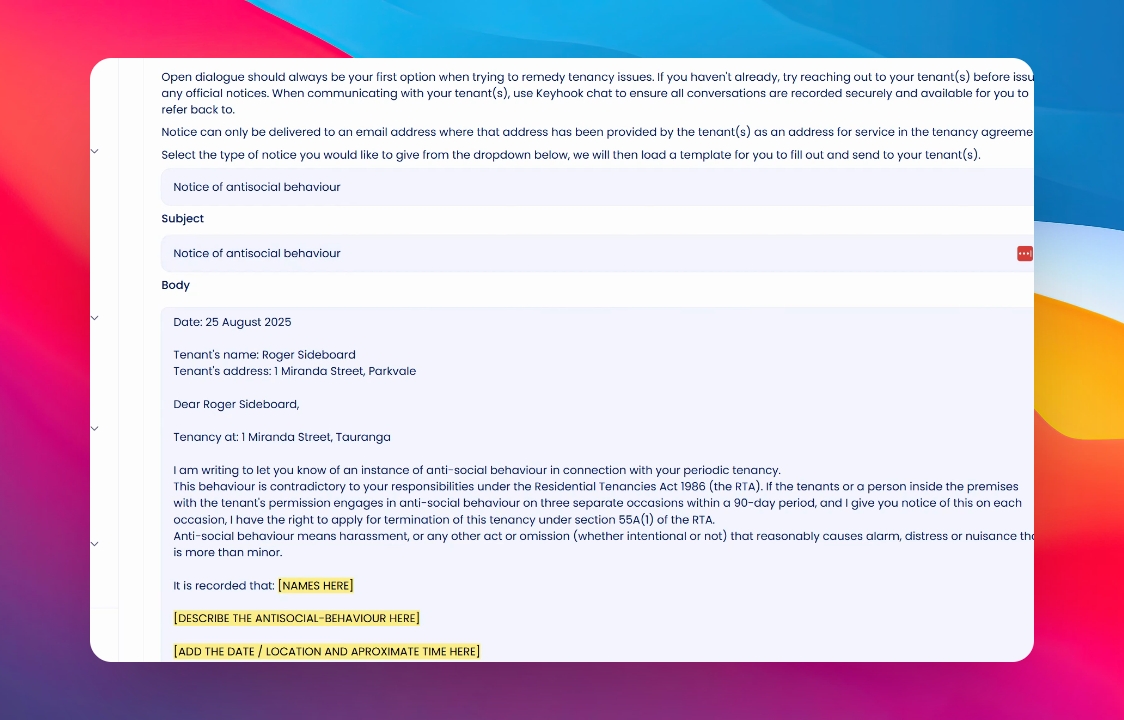
3. Customising the Notice
Once you have selected your notice type, the form will appear with certain fields highlighted in yellow. Update these fields to include the necessary details such as tenant names and a description of the antisocial behaviour.
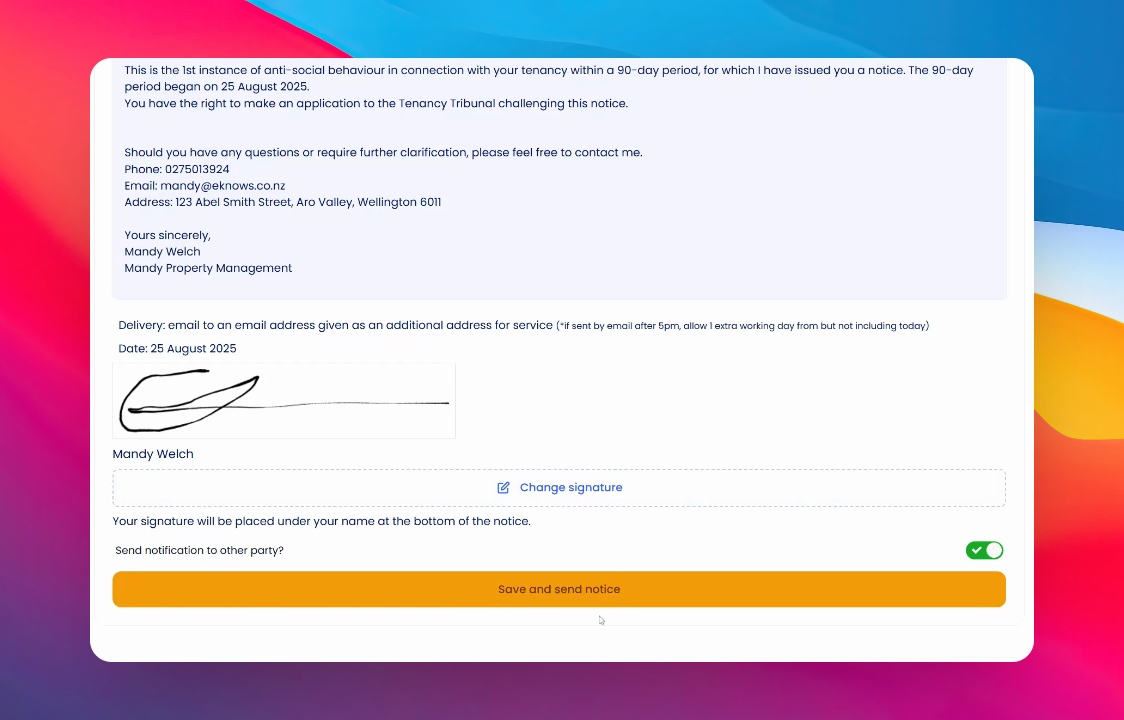
4. Signing and Sending the Notice
When you are satisfied with the notice, click to e-sign it. After signing, ensure to save and then send the notice.
5. Creating Notices
If you wish to create a notice without sending it to the tenant, you can do so using the toggle provided. However, typically you would want to send it right after creation.
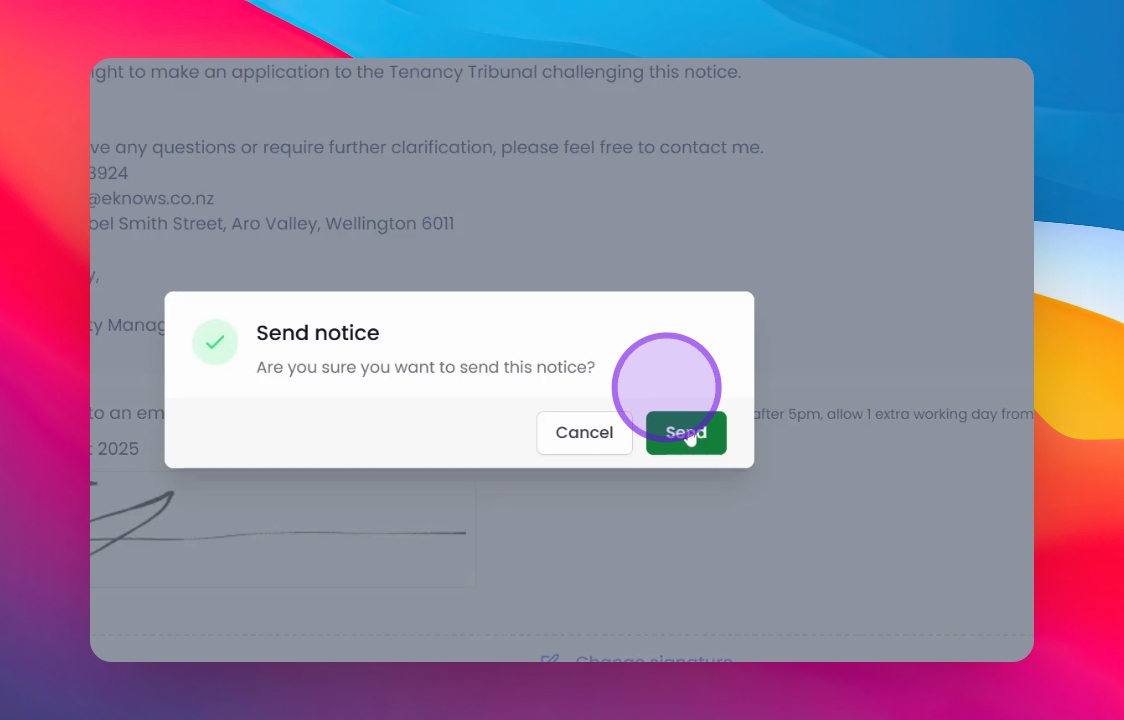
6. Confirming the Send Action
Ensure that you select the option to send and then click save to send the notice. A confirmation prompt will appear asking if you are sure you want to send the notice; confirm by clicking Send.
7. Reviewing Sent Notices
To view notices that you have previously sent, return to the same section. A list of sent notices will be displayed on the screen for your review.
8. Sending New Notices
To send a new notice, navigate again to the Actions button and select Give Notice.
Conclusion
By following these steps, you can effectively prepare and send various types of notices to your tenants, ensuring clear communication and compliance within your property management practices.