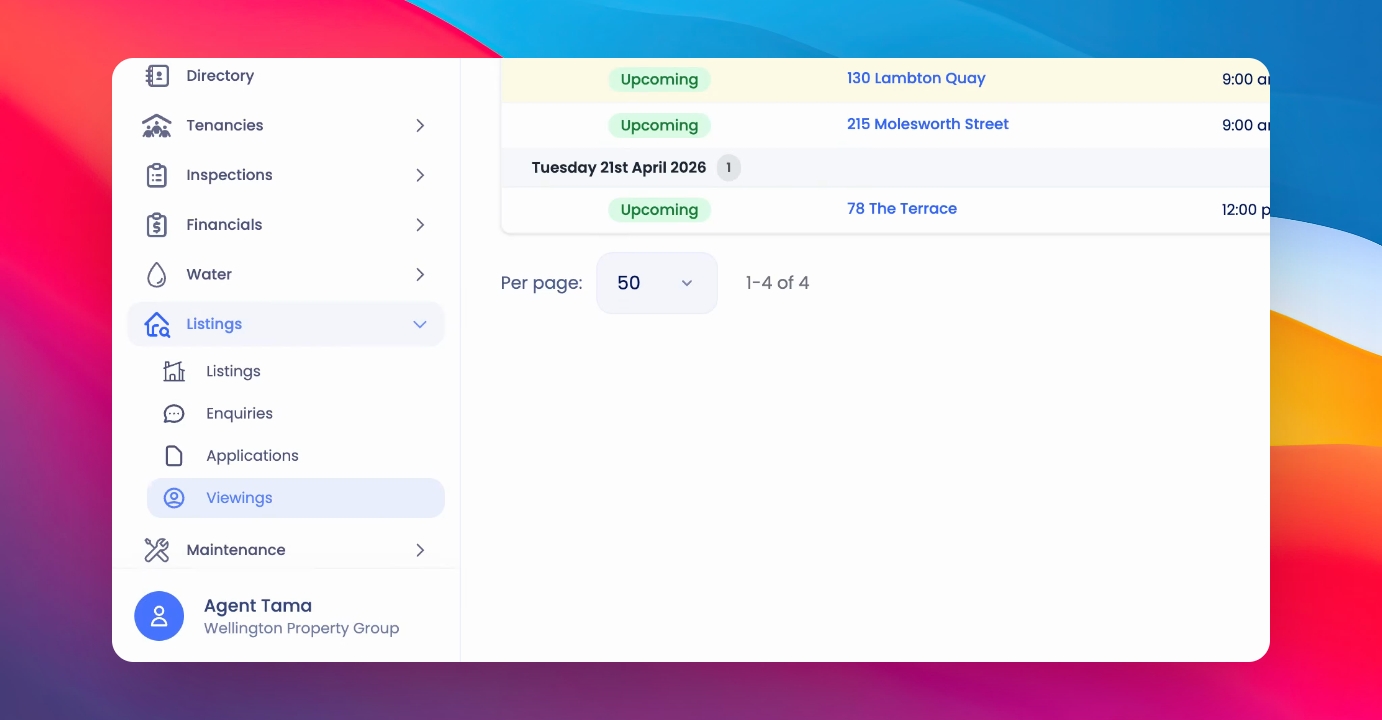
To manage your viewings, click on Viewings under the Listings heading in the navigation bar. Let's look at the steps:
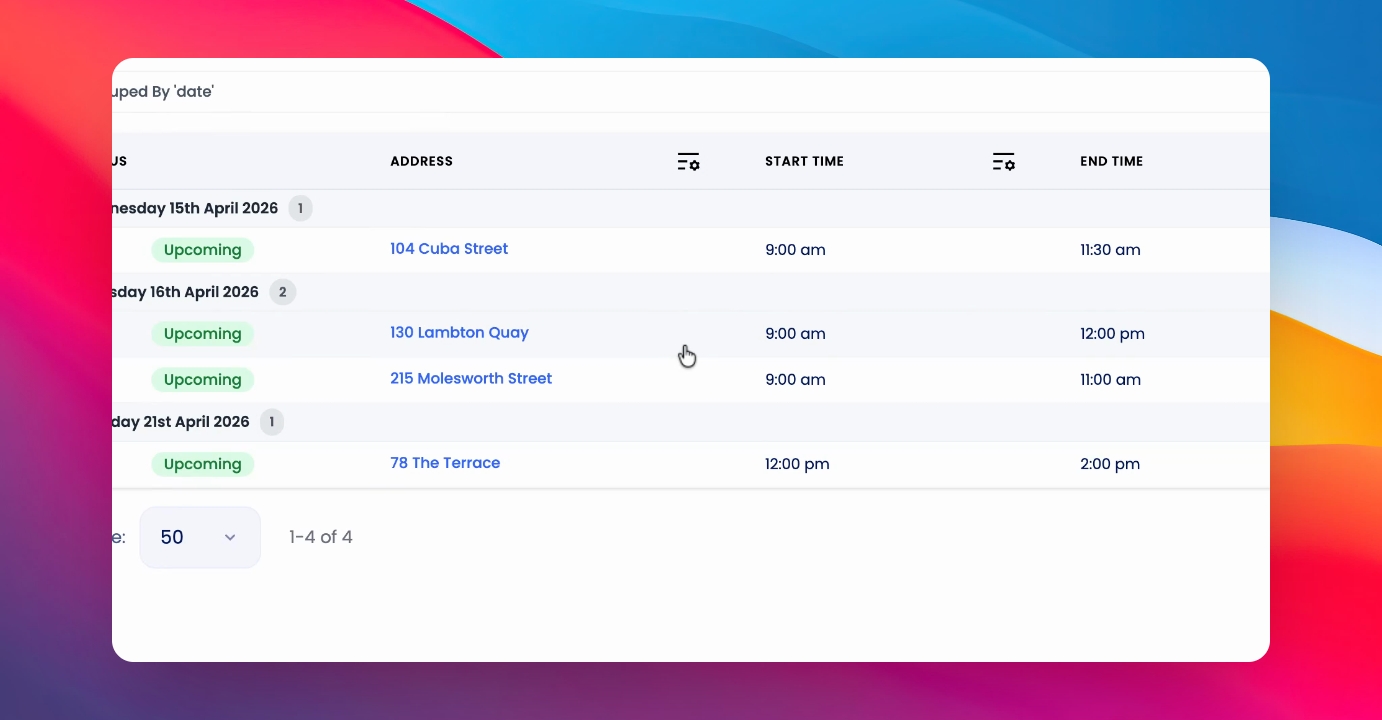
Step 1: Manage a Listing
Click into the listing on the table to manage it.
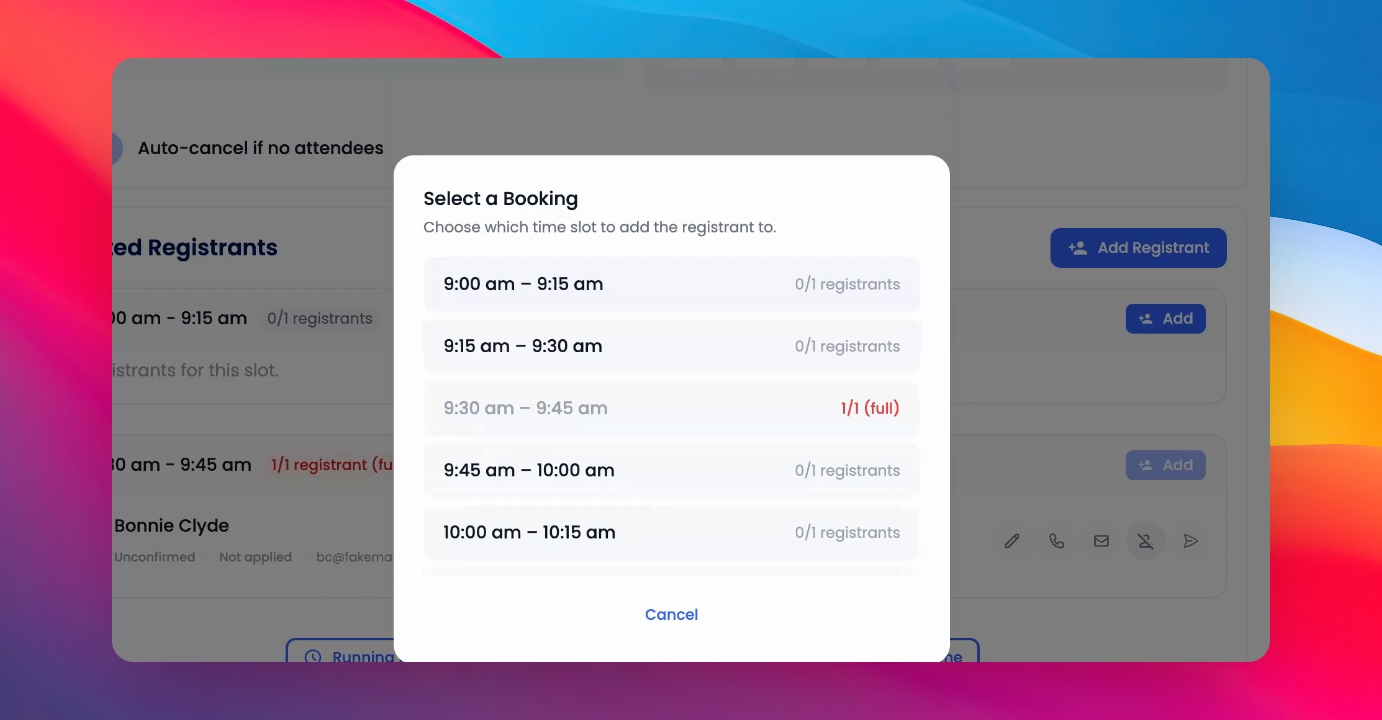
Step 2: Add a Registrant
Select a booking window if you have set up booking windows, enter the name, Email, Phone number and any notes and click Create.
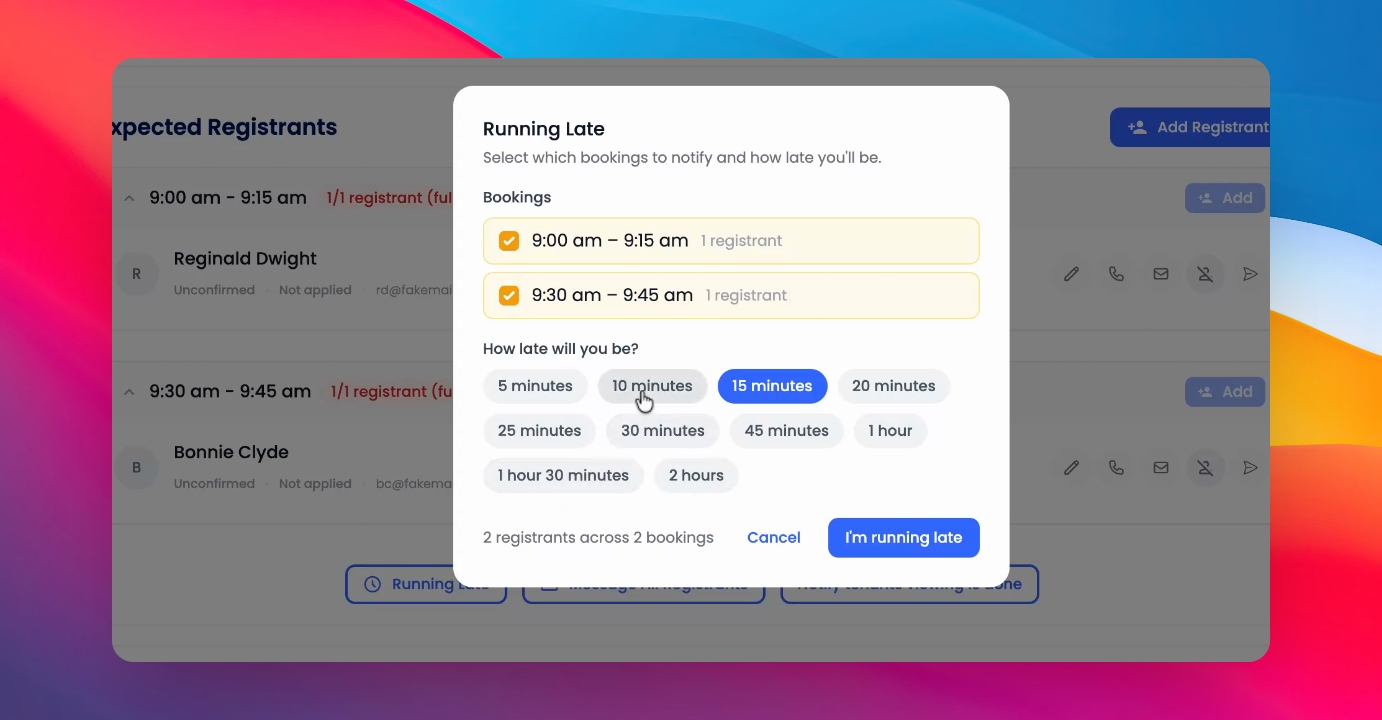
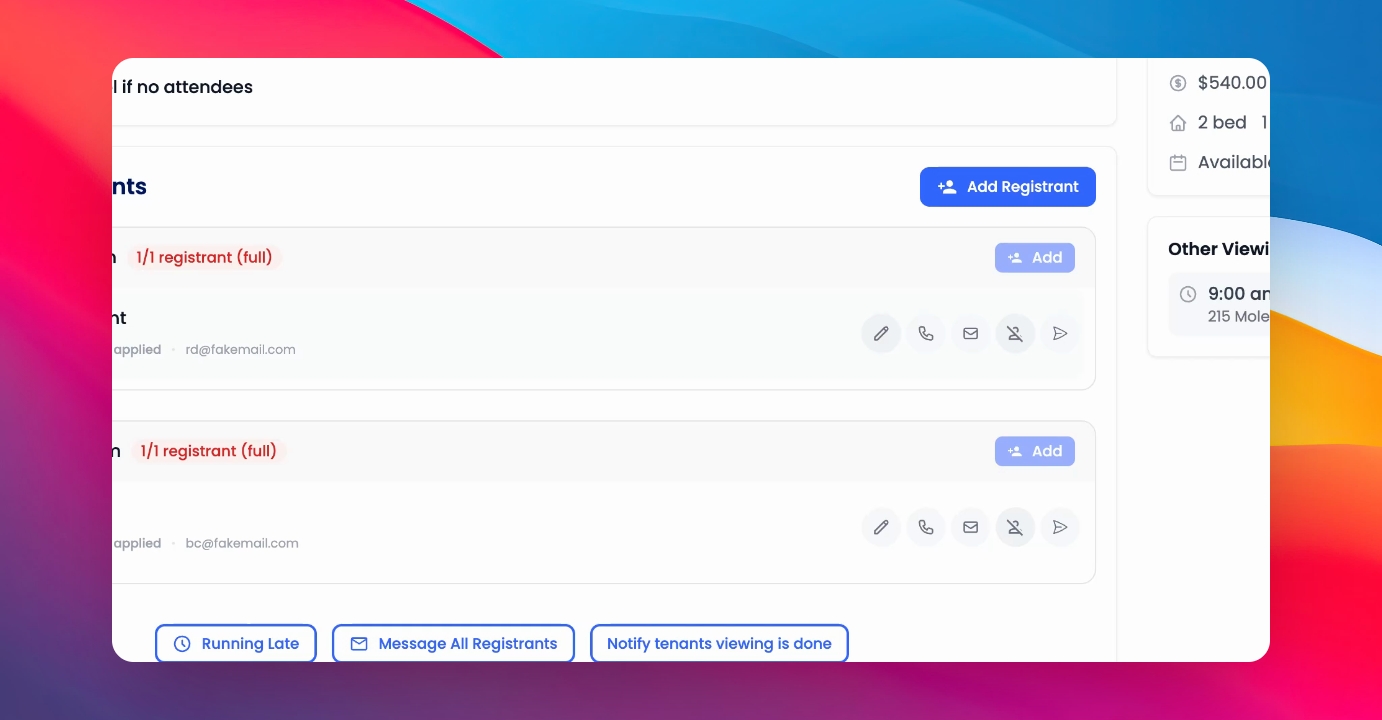
Step 3: Quick Actions
Below the registrants, you have some quick actions:
Email all registrants to notify them if you are running late.
Send a custom message to all applicants or registrants.
Notify the current tenant once the viewing is complete.
Step 4: Applicant Actions
Each applicant has several actions available:
Use the Edit button to confirm or unconfirm each applicant.
Call or email them.
Mark them as attended.
Send an application link to the registrant.
Step 5: Update Viewing
After any changes to the date, time, or booking settings, click Update Viewing at the bottom to save and update the viewing.