Managing arrears in your tenancy system involves viewing reports, filtering data, and taking actions such as adding notes or sending notices. Let's look at the steps:
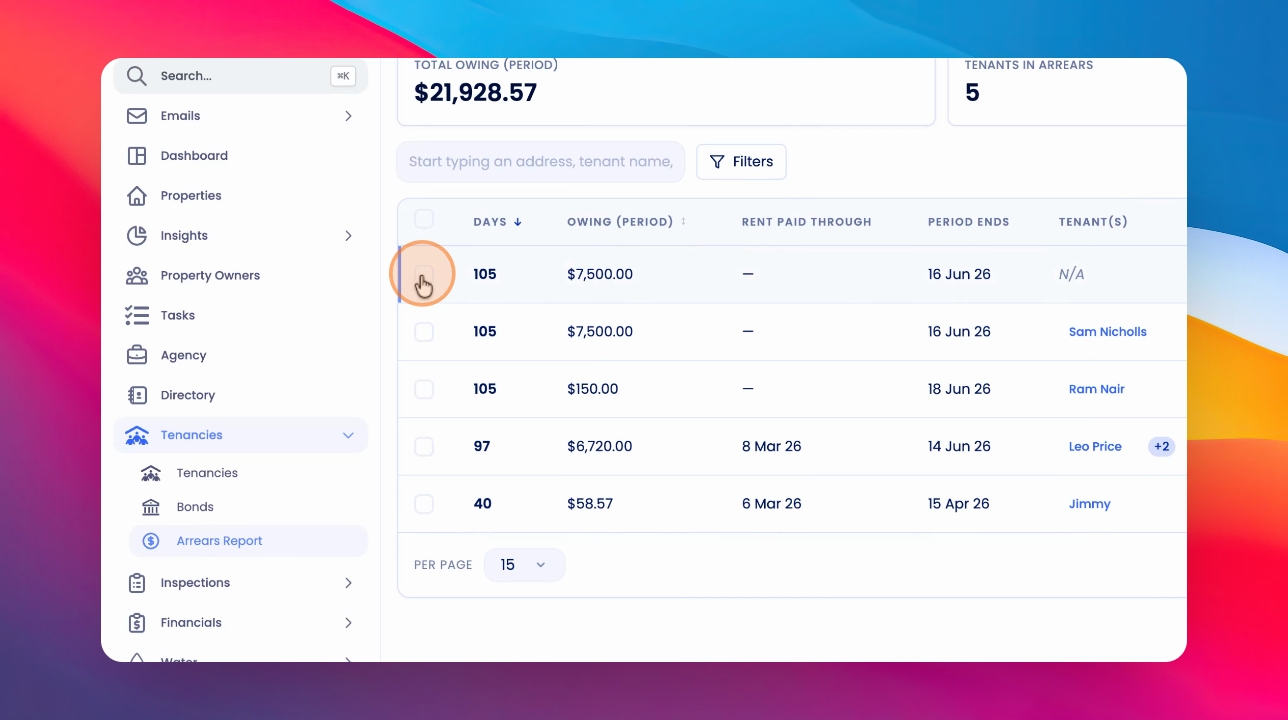
Step 1: Open Arrears Report
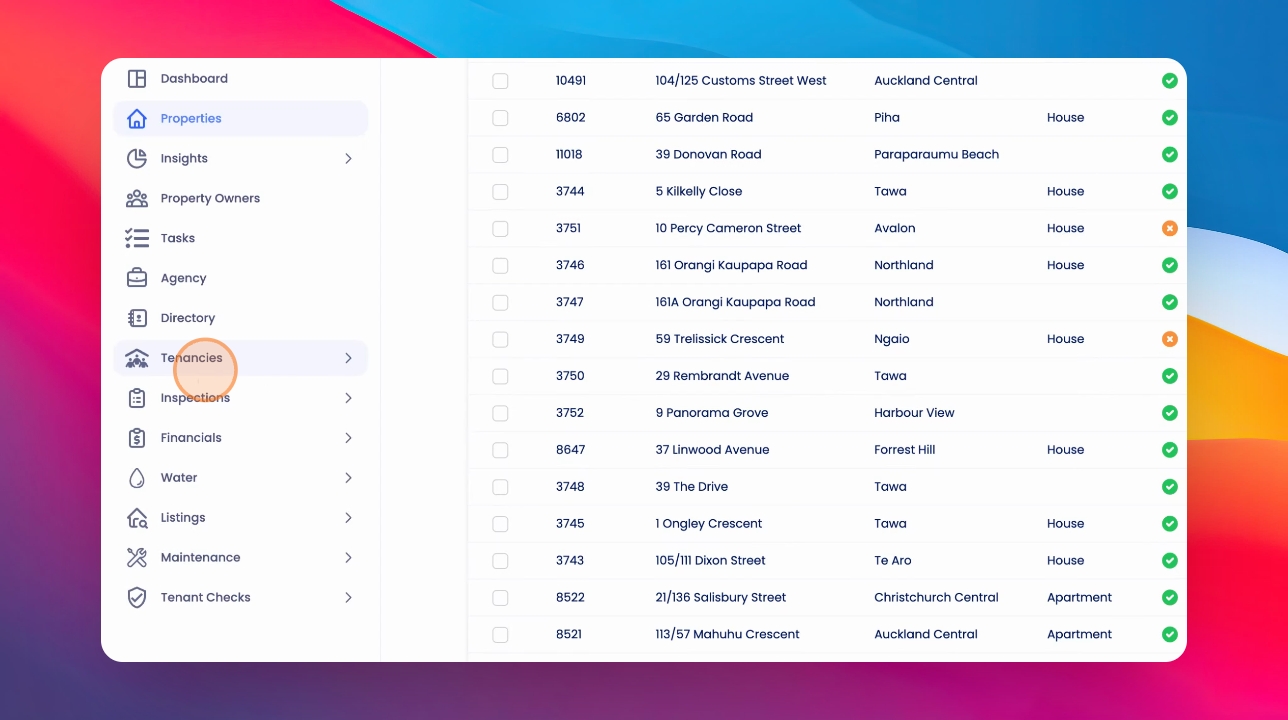
Click on the Tenancies section and then click on Arrears Report to access your arrears information.
Step 2: Review Arrears Report
View your arrears report to see outstanding payments and related details.
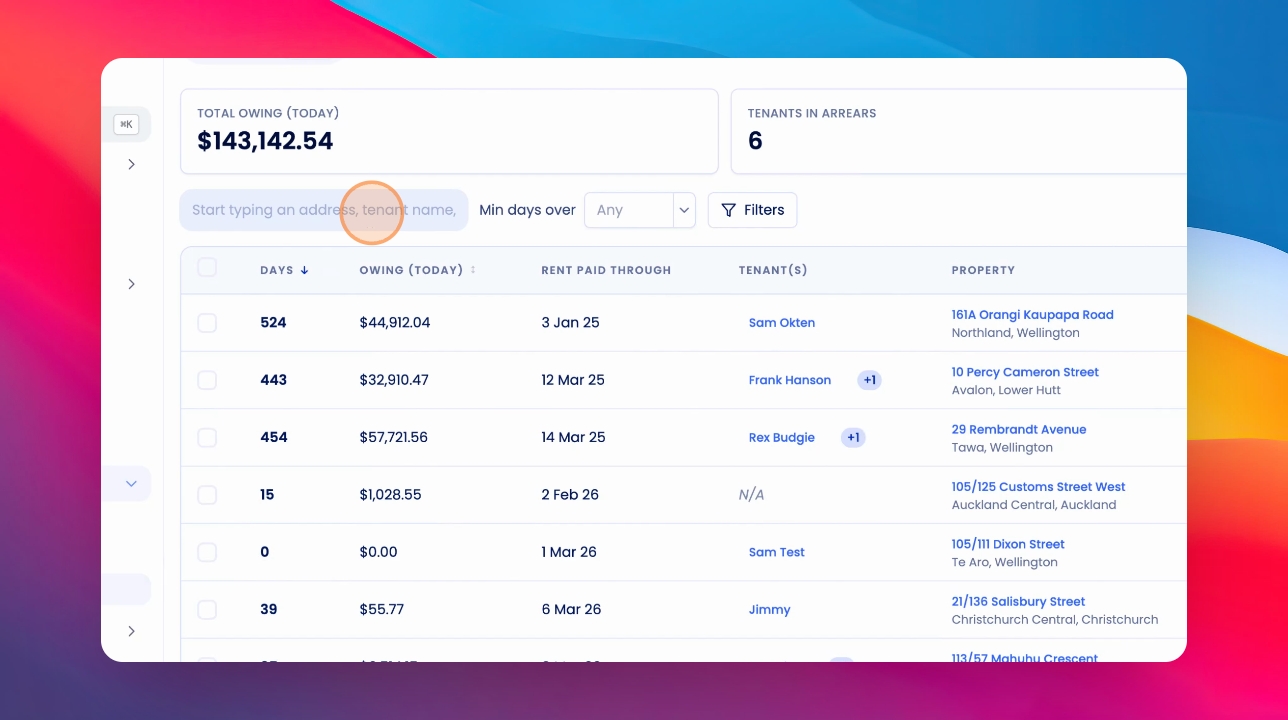
Step 3: Search and Filter Arrears
You can search for an address or a tenant's name. Filter the table by minimum days in arrears or other criteria. Apply filters such as suburb, city, arrears values, and more to narrow down the results.
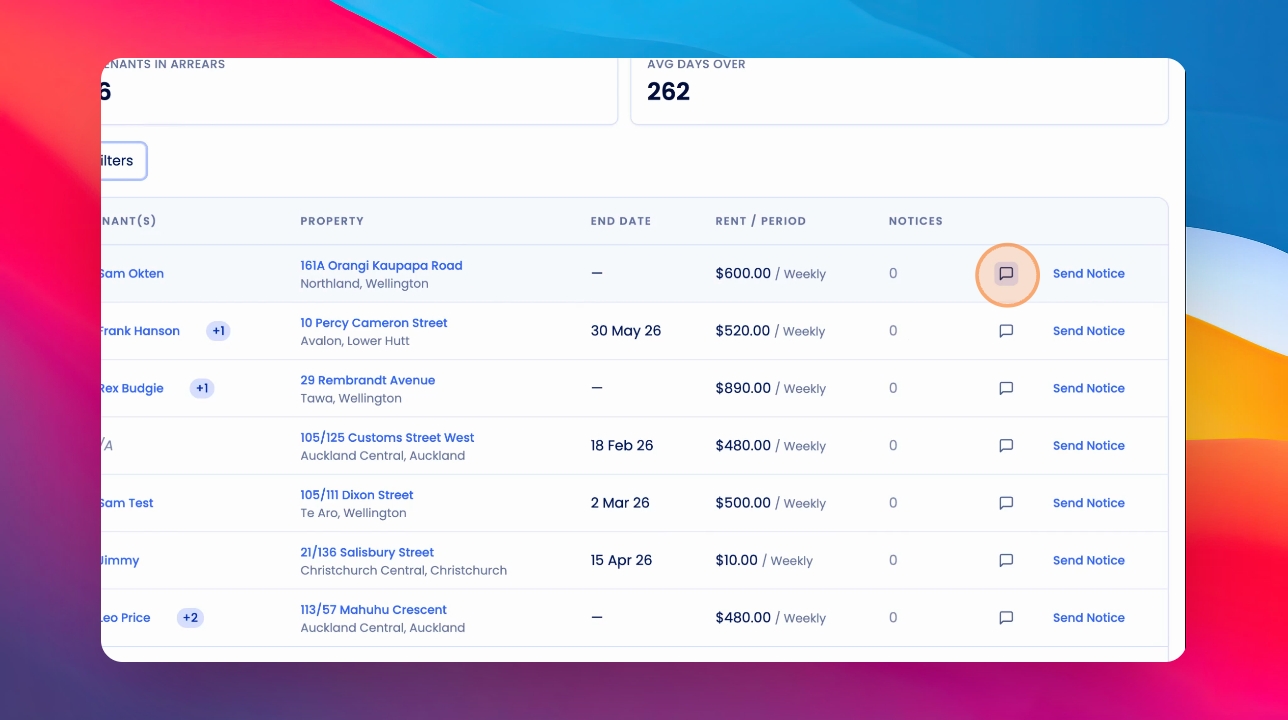
Step 4: Add a Note to an Arrears
Click the Note icon next to an arrears entry, type your note, and click Save.
Step 5: View, Edit, or Remove Notes
You can view notes at a glance and also edit or remove them as needed.
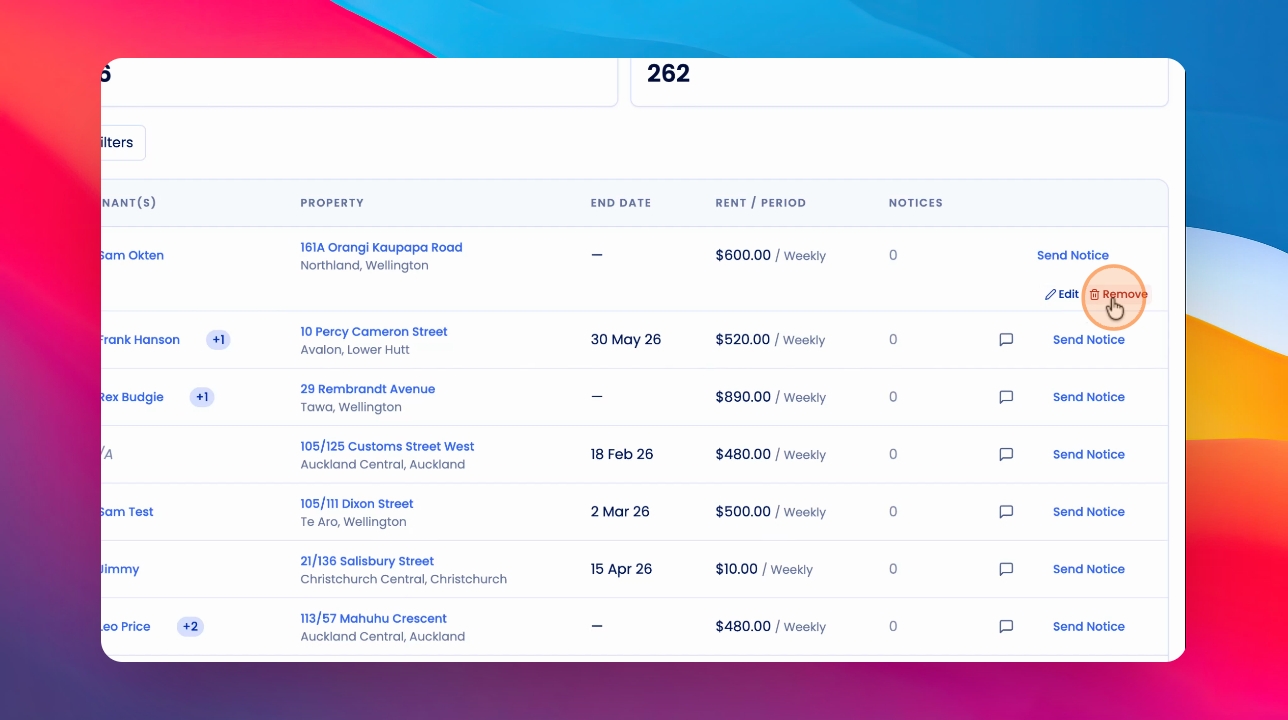
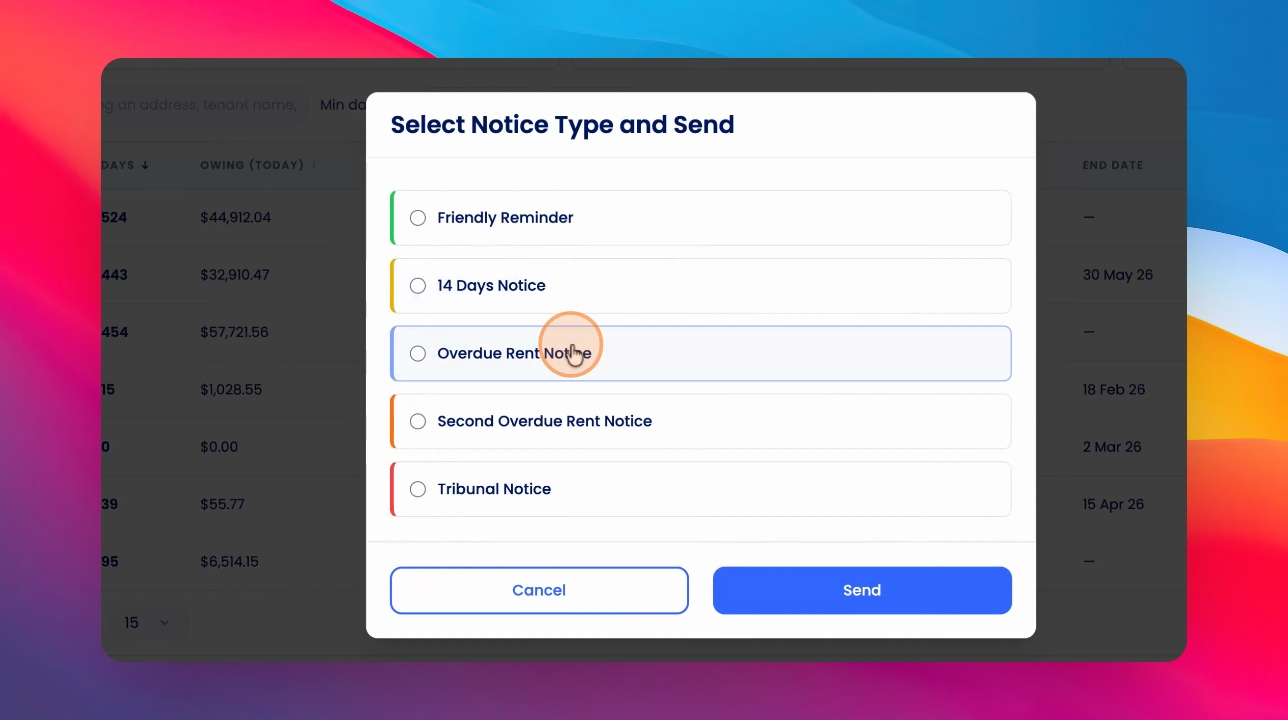
Step 6: Send an Arrears Notice
Click Send Notice, choose the notice type, ensure all required fields are filled, and click Send.
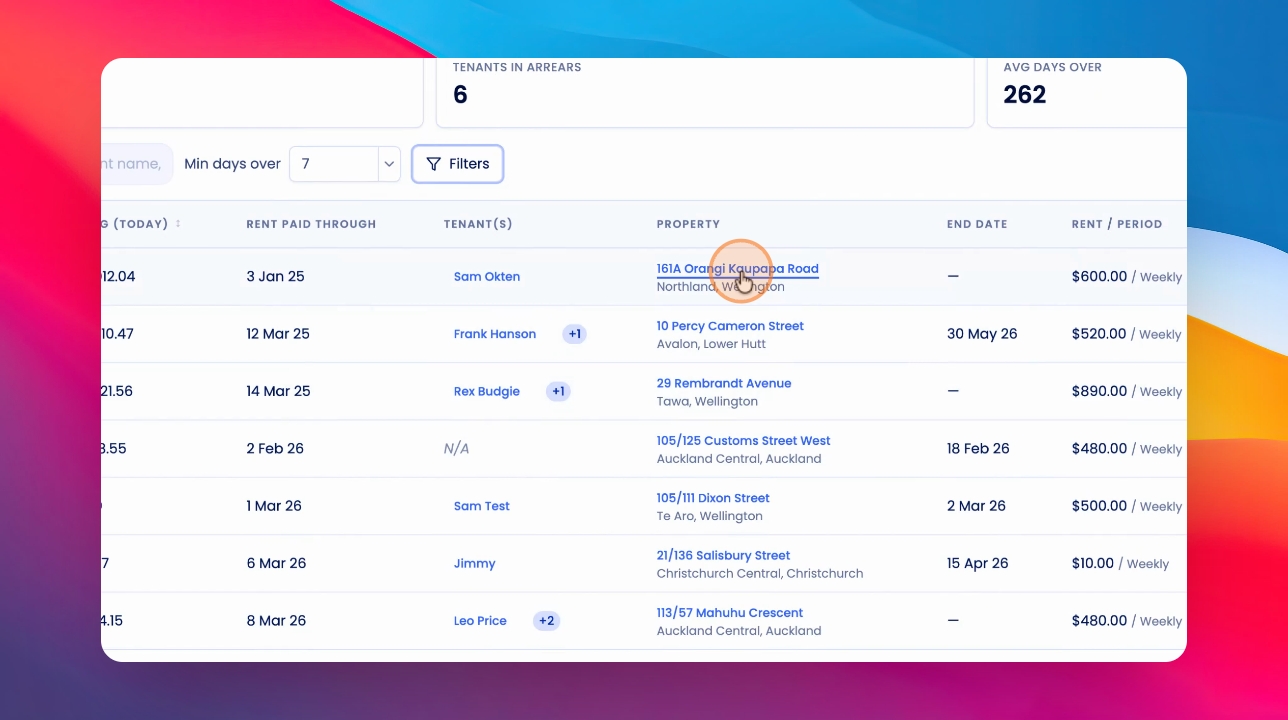
Step 7: View Rent Ledger
To see the rent ledger for a property, click on the property address from the arrears table. Here, you can view the full rent ledger and tenancy overview.
Step 8: Return to Arrears List
Go back to the arrears list to continue managing other entries.
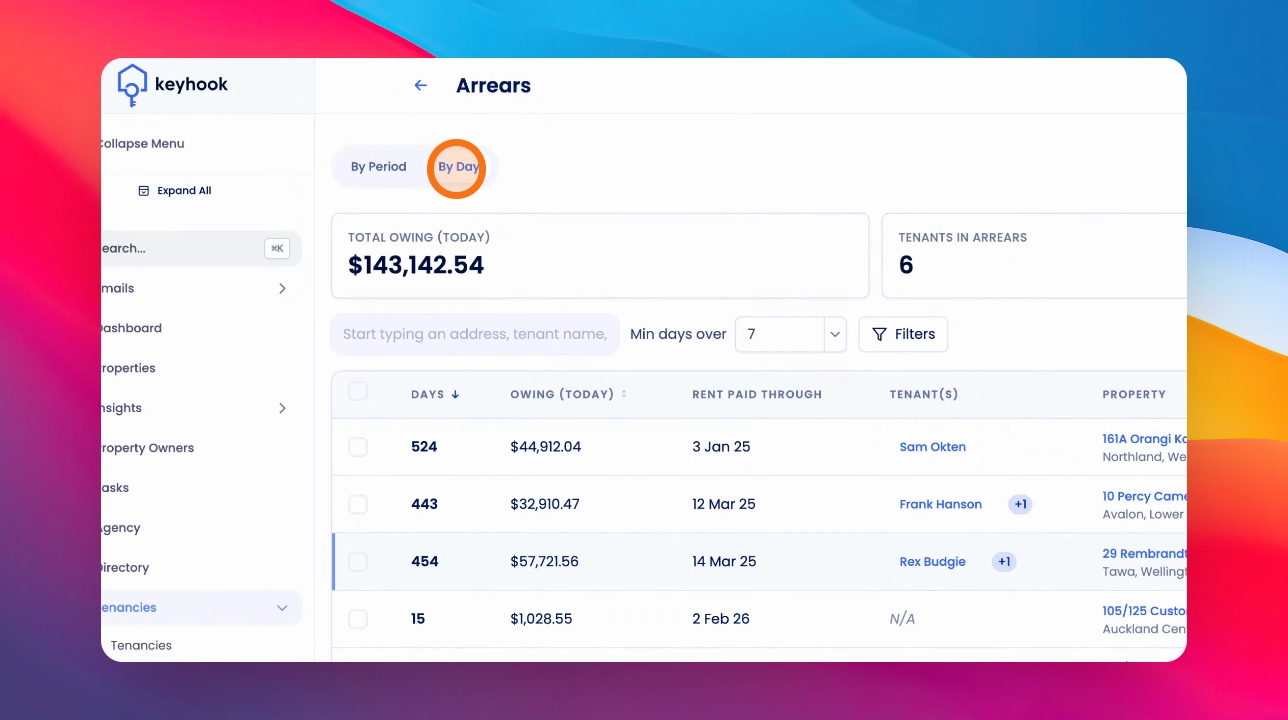
Step 9: Adjust Arrears View
Drag the slider down to the bottom of the screen. You can toggle between different arrears views, such as by day (based on rent paid through) or by period (based on rent period due date).
Step 10: Select Portfolio
The arrears list will display based on the portfolio selected. To choose your portfolio, click your name at the bottom left corner and select your portfolio view.

Step 11: Bulk Send Arrears Notices
To send arrears notices in bulk, select multiple entries, click Send Arrears Notices, choose the notice type, and then click Send.