TL;DR
Move to the inspection section
This will take you to new inspection form
Basic will have all the headers and Detailed will have the subsections along with it
Fill out scheduling details. Time is in 24hr format
This will confirm and will take you to the inspection interface
Let's do it together
Step 1: Navigate to New Inspection
Go to the property that you want to inspect, and on the overview page, click on New Inspection.
Step 2: Choose Inspection Type
You will have a choice between a Detailed and Basic inspection.
Step 3: Understand Inspection Types
The Basic option includes all of the rooms without the extras, while the Detailed inspection covers your extras that you've set up, such as your walls and ceilings.
Step 4: Set Up the Inspection
For this example we selected the Detailed option, and chose a Routine Inspection. Then set your inspection date.
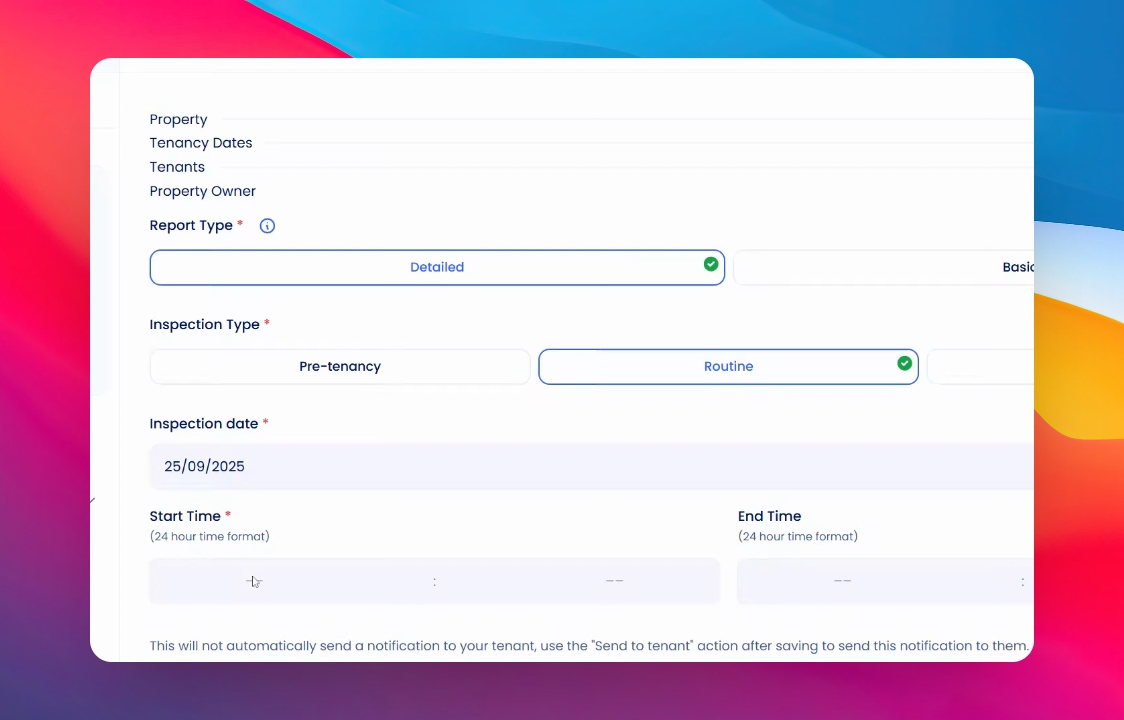
Step 5: Enter Inspection Time
Please note that the time should be in 24-hour format. Once you're ready, click save.
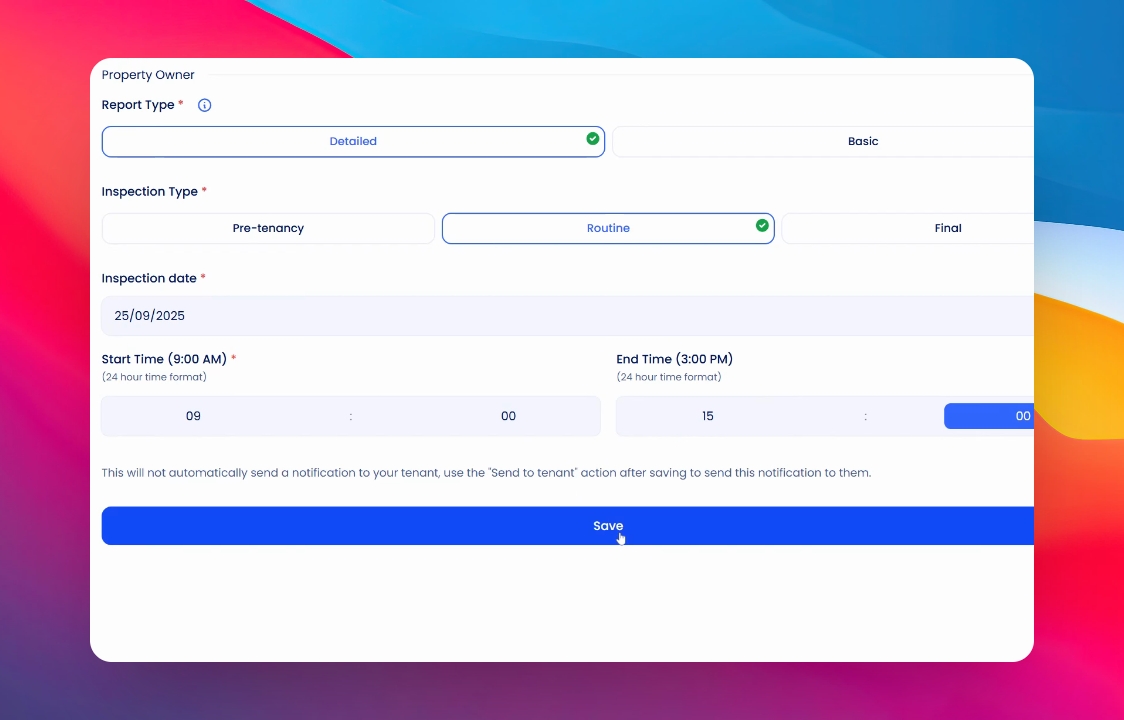
By following these steps, you will successfully add an inspection to the tenancy, ensuring all necessary details are captured accurately.
If you need more help or have any questions, just reach out to us at support@keyhook.com — we're always here to help!