In this tutorial, you will learn how to review and interact with your 360 inspections effectively. Let's look at the steps:
Step 1: Click on the Inspection
Click on the inspection you want to review.
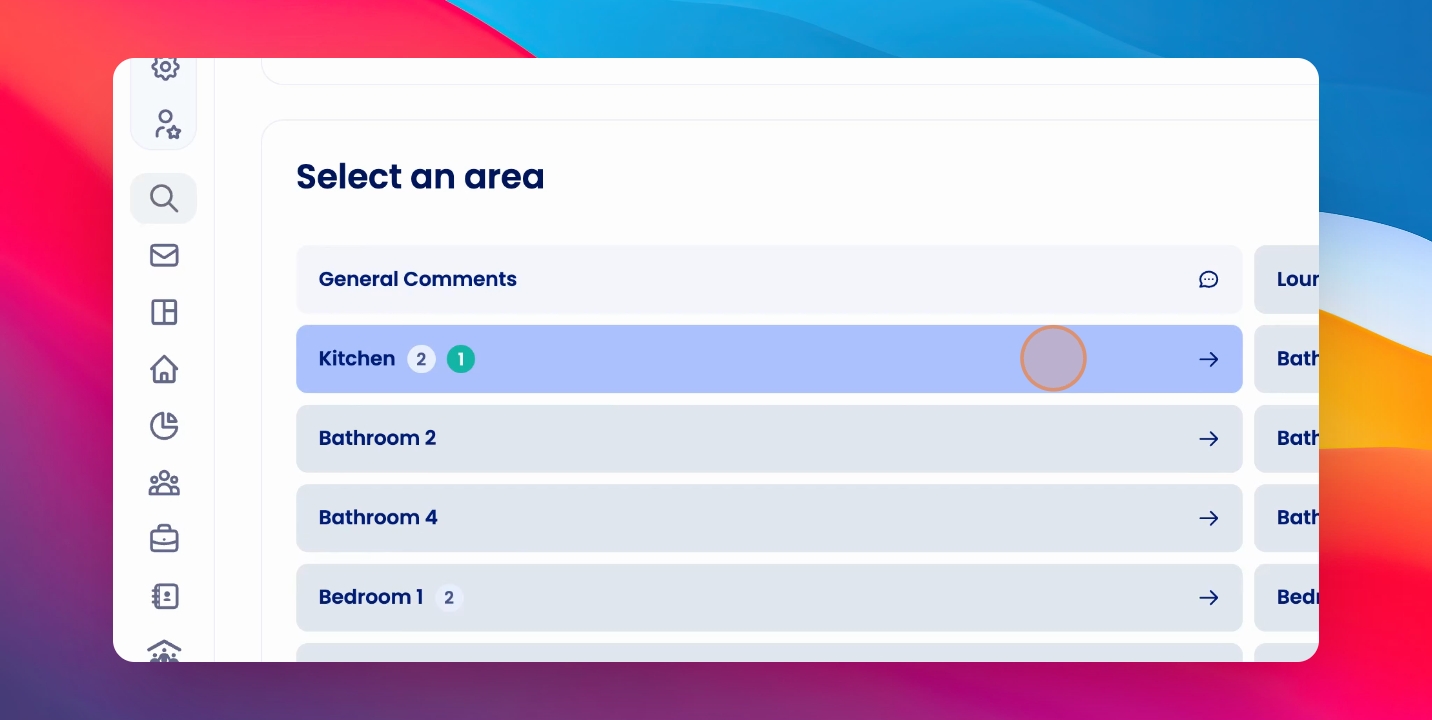
Step 2: Enter an Area
Go into an area to access the 360 images.
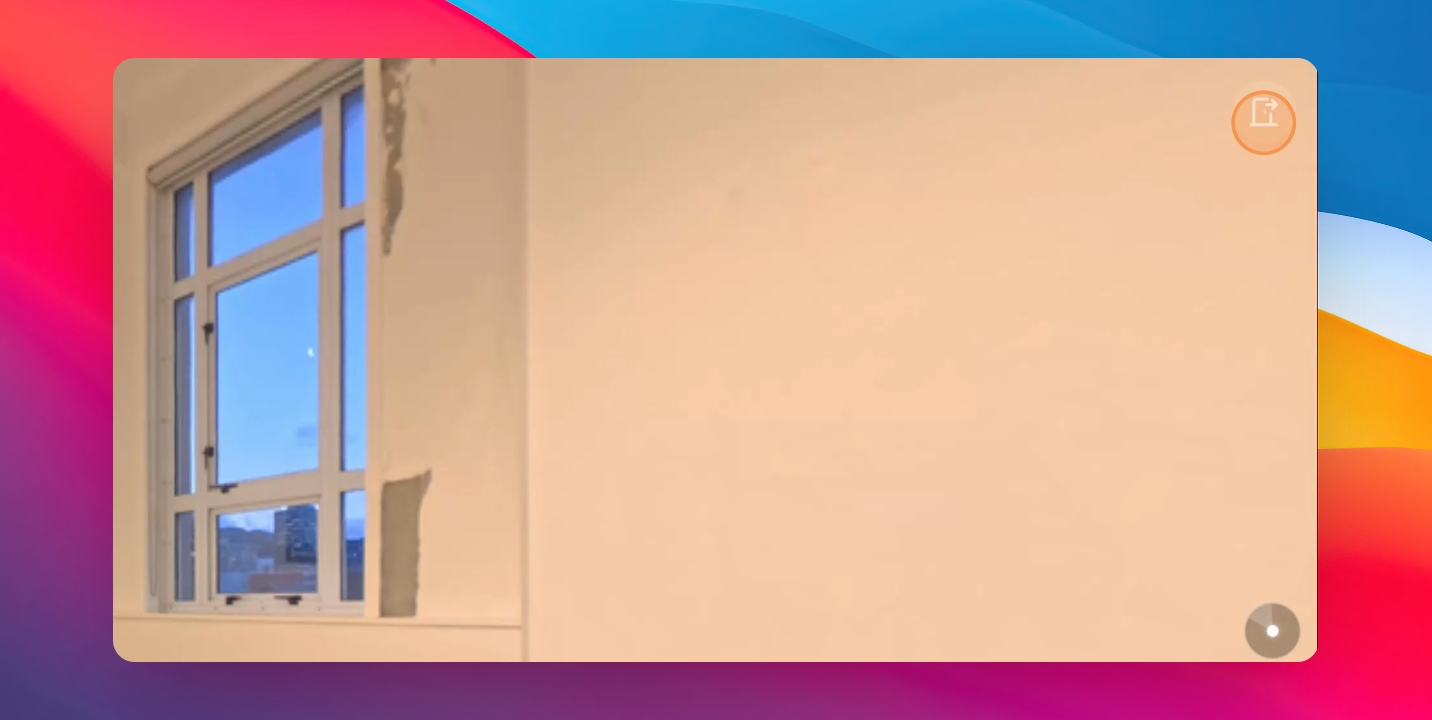
Step 3: Open the 360 Image
Click on the 360 image to open it.
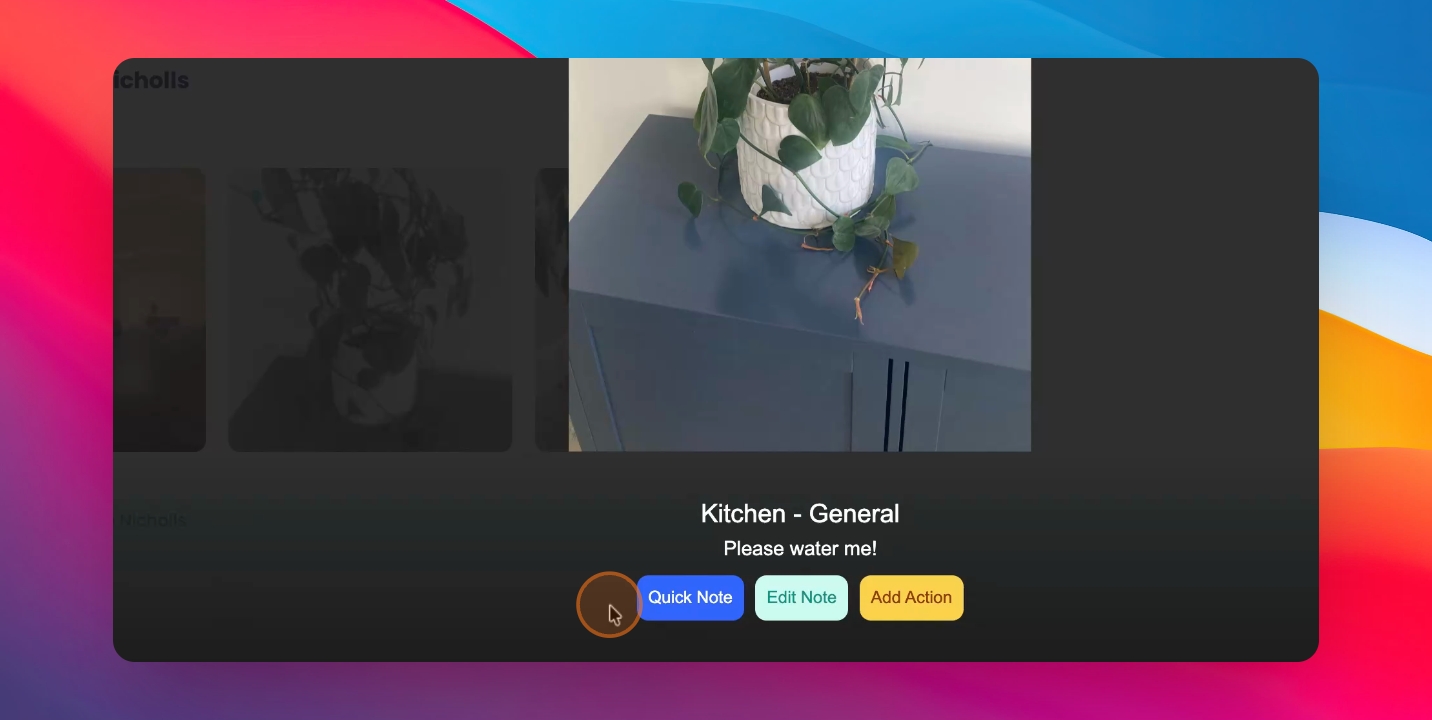
Step 4: Edit Notes or Actions
Click to edit notes or actions on these pictures.
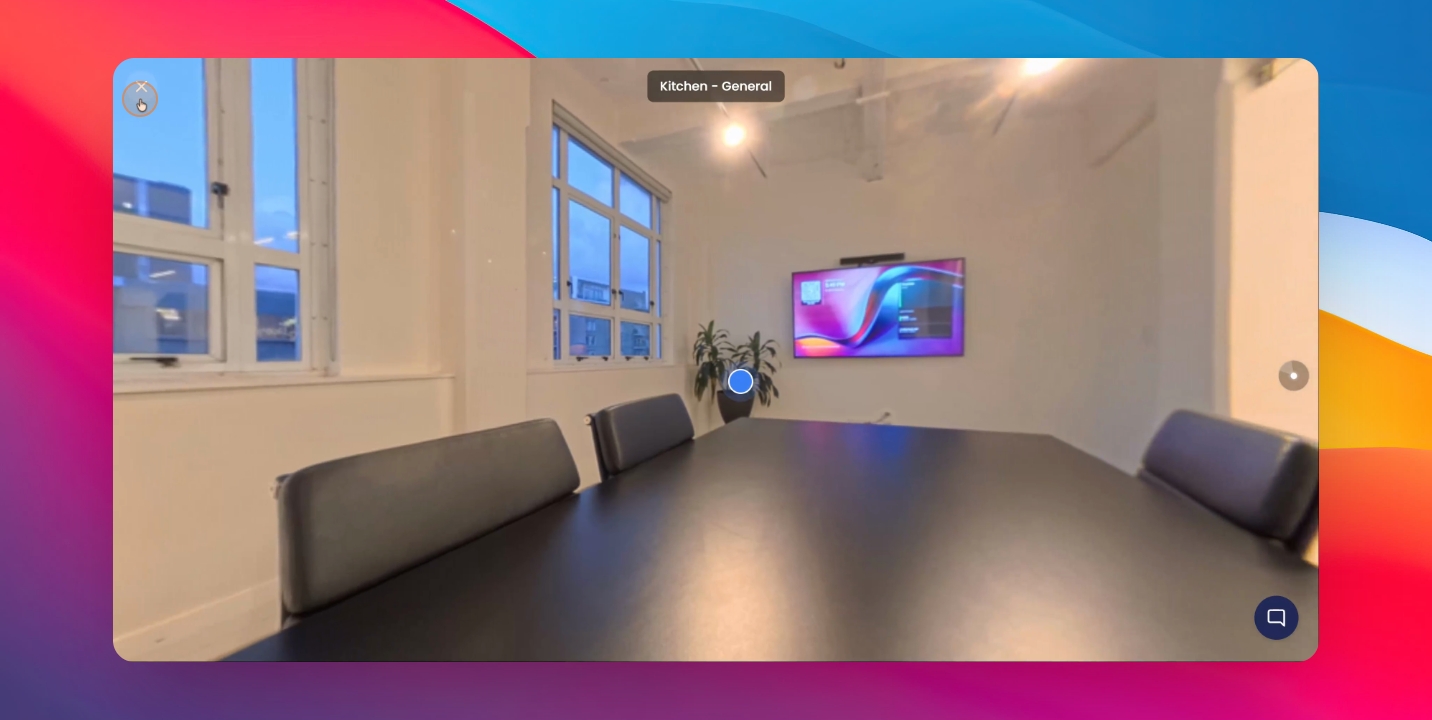
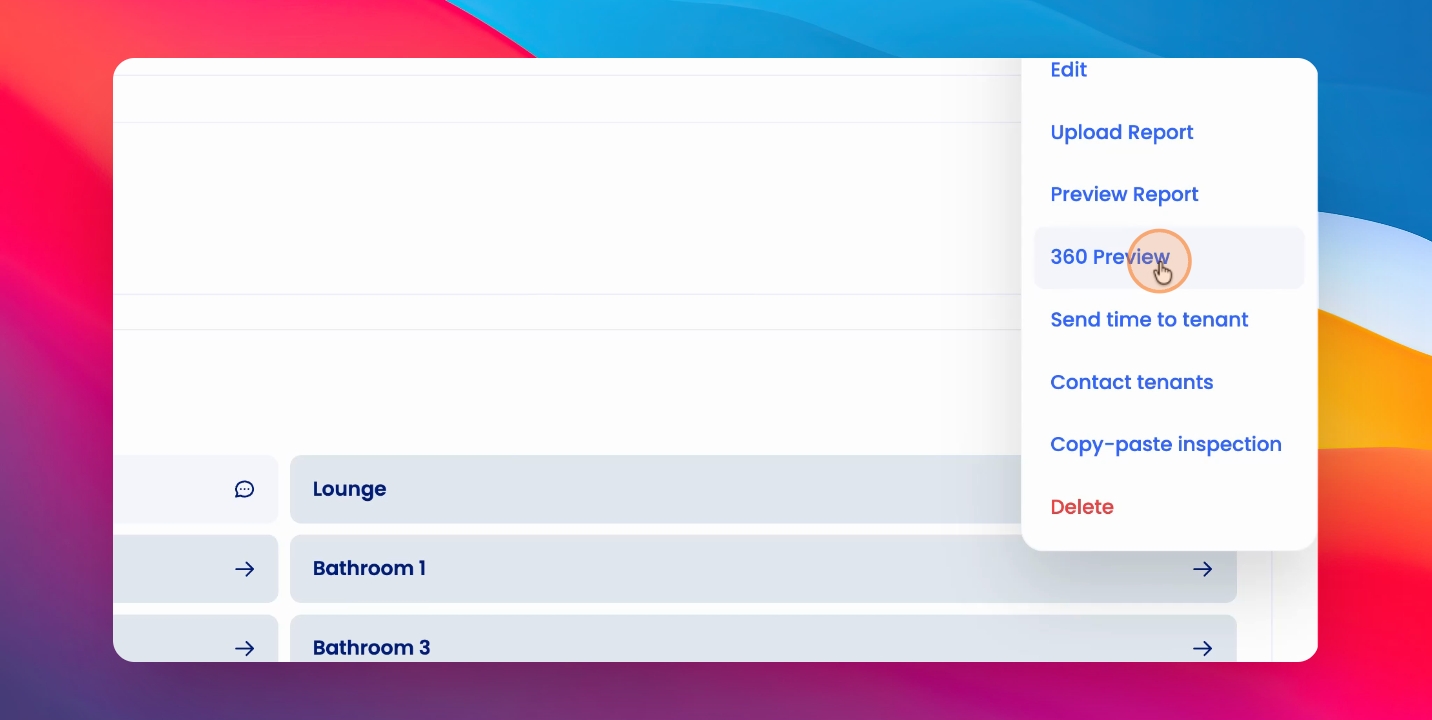
Step 5: View Full Interactive Preview
To view a full interactive 360 preview, click on Actions.
Step 6: Access 360 Preview
Click on 360 Preview at the bottom of the screen.
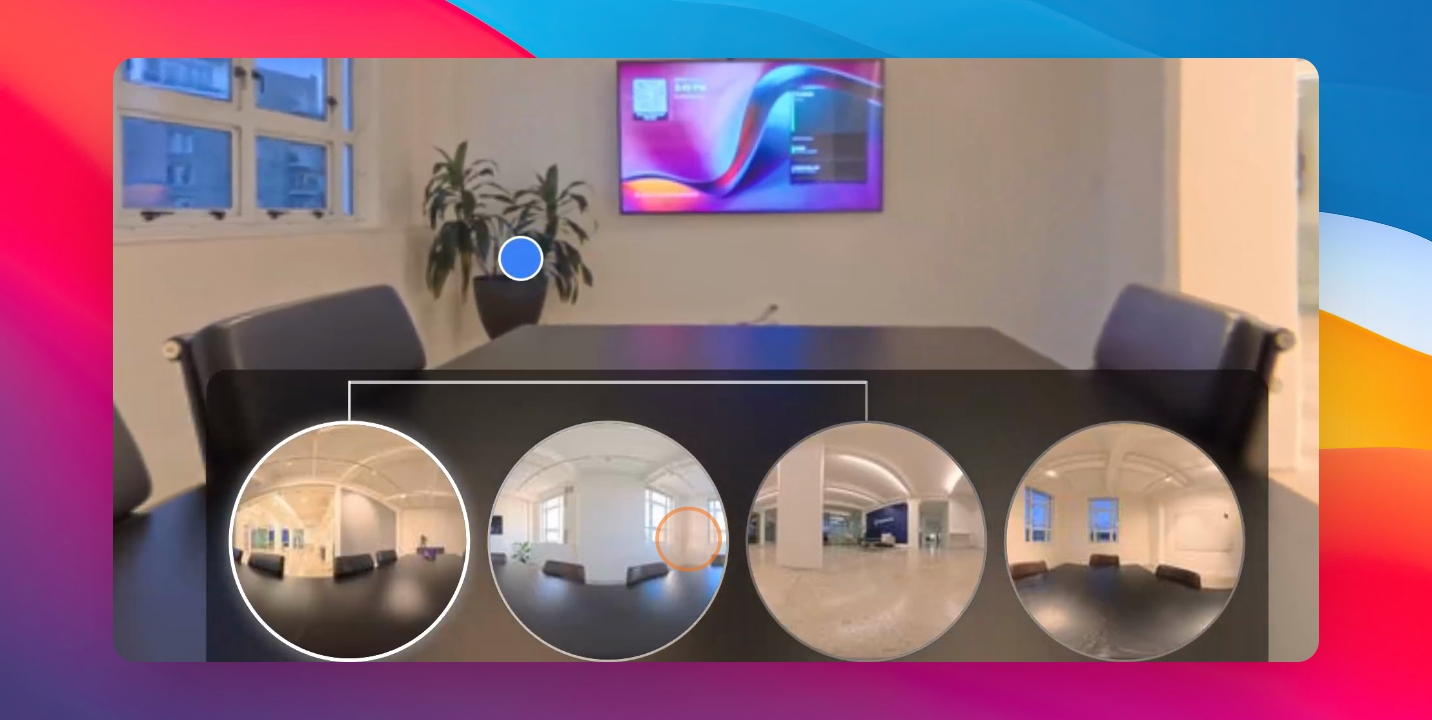
Step 7: Move Between 360 Images
You can move between 360 images easily.
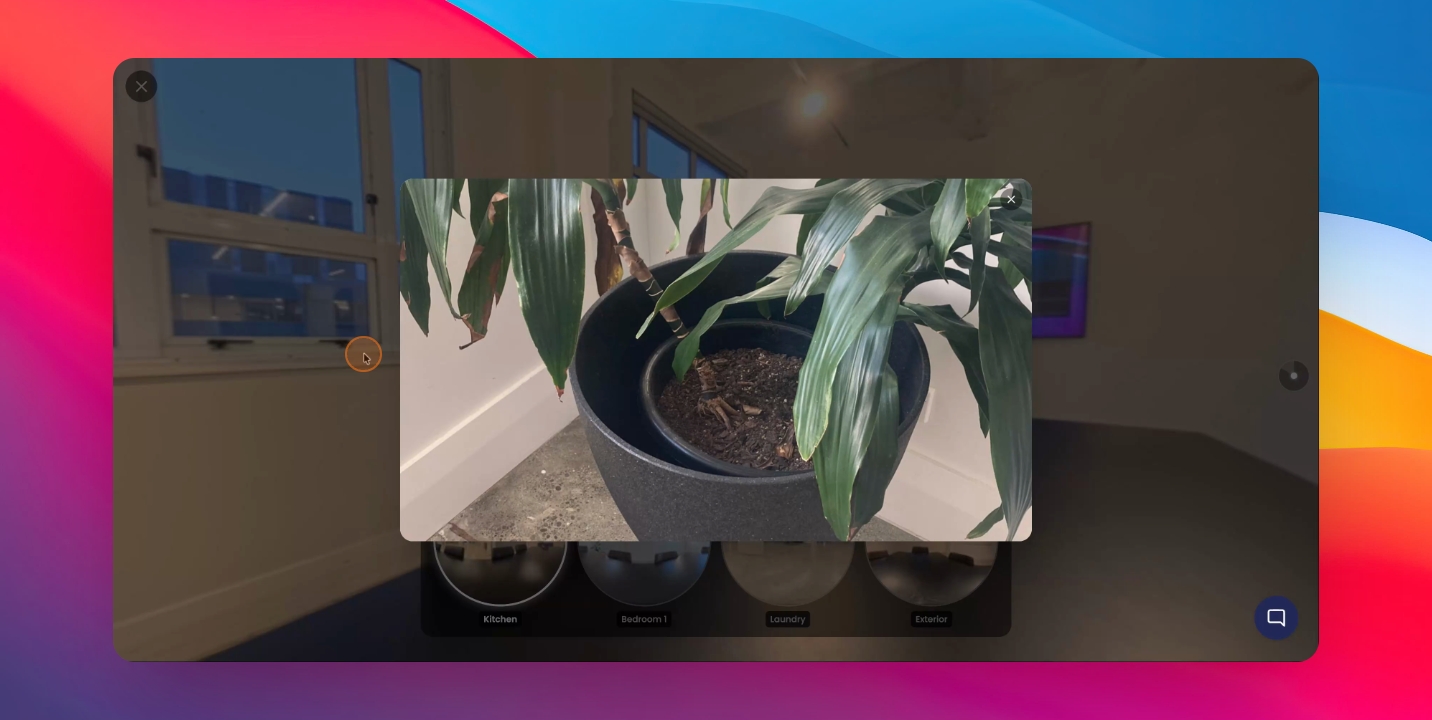
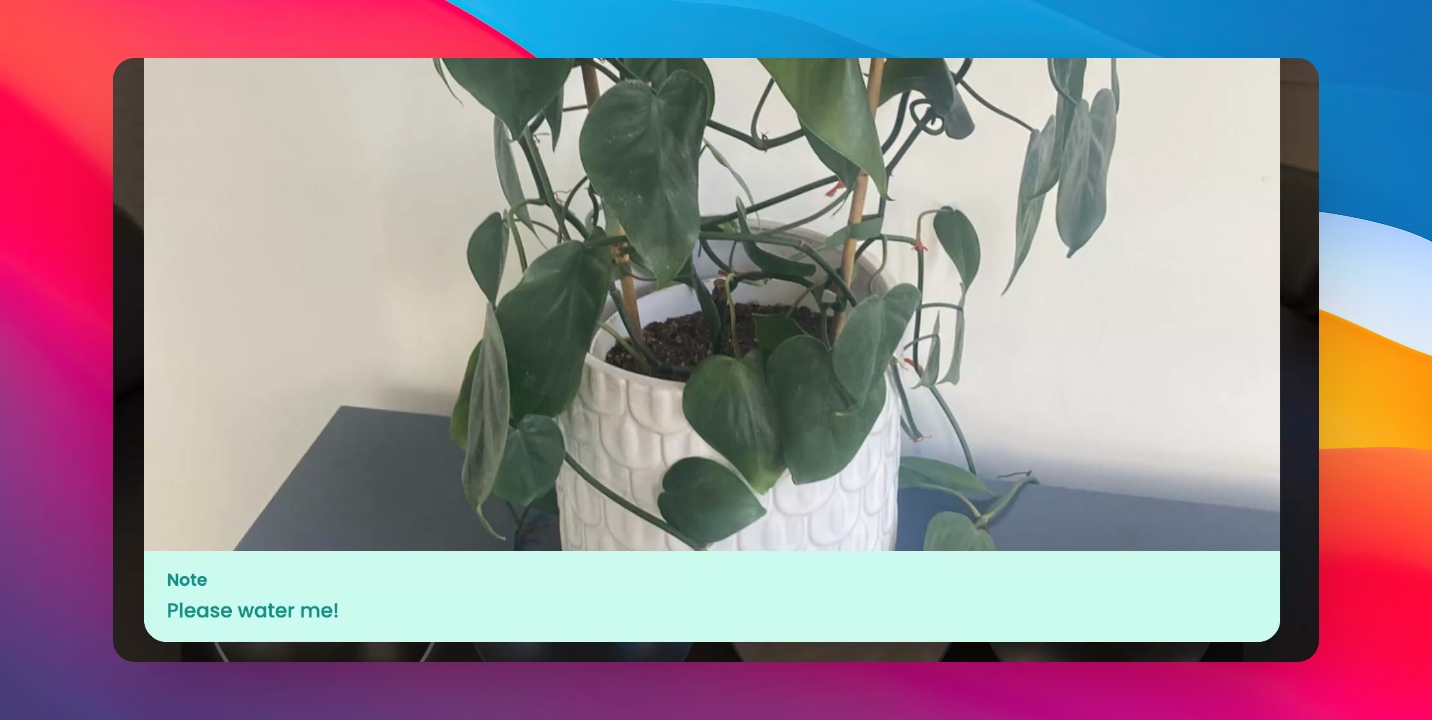
Step 8: Click on Pinned Items
On the 360 images, you can click on pinned items for more details.
Step 9: View Notes on Pinned Items
You can also see notes on items that you have pinned and added a note to within the 360 image.
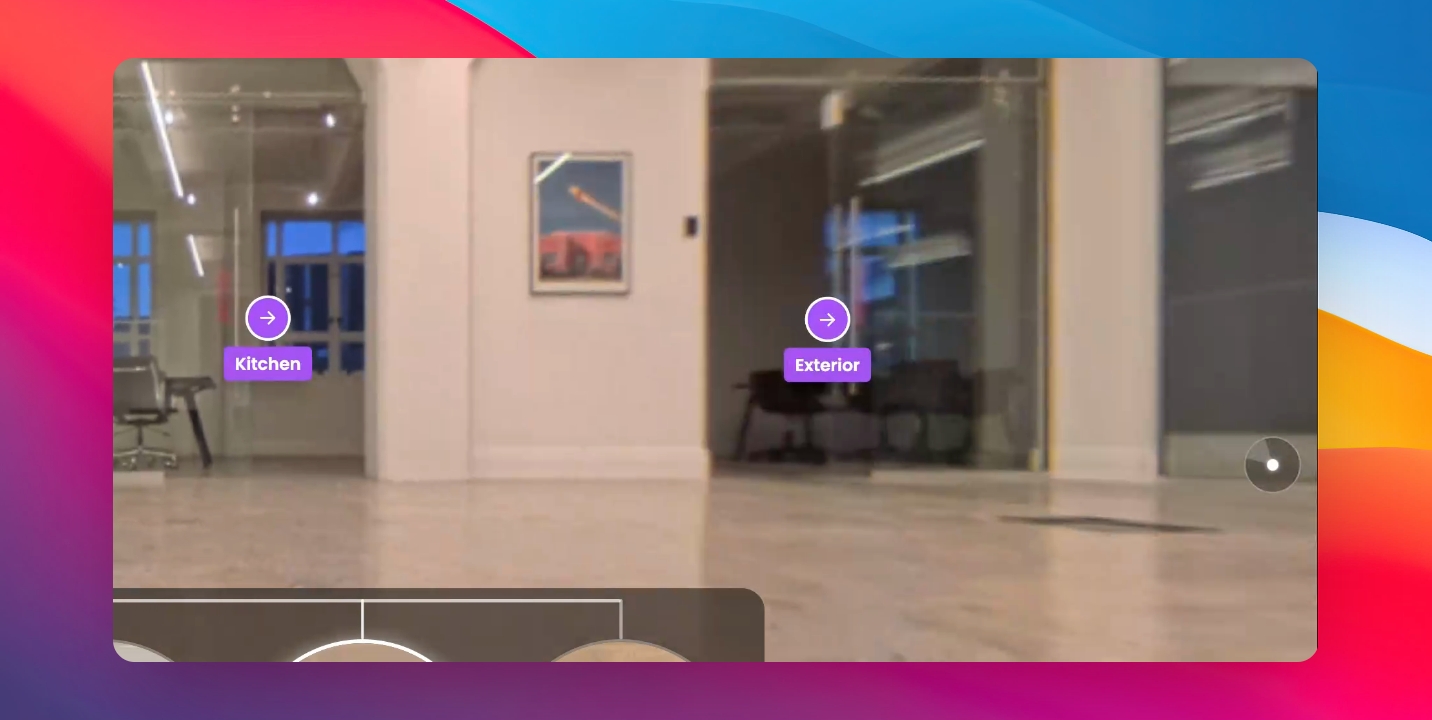
Step 10: Navigate Through Connectors
To navigate through connectors you have created, click on the connector icon and connect between different areas.
Step 11: Switch Between 360 Images
If you have multiple 360 images within one room, switch between them using the Open Closed Door icon at the top right-hand corner of the screen.